Importing a point cloud into Revit is the first step in the Scan-to-BIM workflow — the process of turning real-world scan data into an intelligent Building Information Model. Whether you are renovating an existing building, verifying construction progress, or documenting as-built conditions, getting point cloud data into Revit correctly determines how efficient and accurate the rest of your workflow will be.
This guide covers the complete process: which file formats Revit supports, how to import and position point clouds, how to work with the data inside Revit, and how to manage performance with large datasets. It also clarifies the distinction between the scan data you receive and the BIM modeling work that follows.
Why Import Point Clouds into Revit?
Point clouds give Revit users something that drawings and field notes cannot — a millimeter-accurate, three-dimensional representation of existing conditions. Here is why that matters:
Renovation and retrofit design. When designing within an existing building, you need to know exactly where walls, columns, MEP systems, and structural elements are located. A point cloud provides that reality check, eliminating the measurement errors and assumptions that cause costly field conflicts.
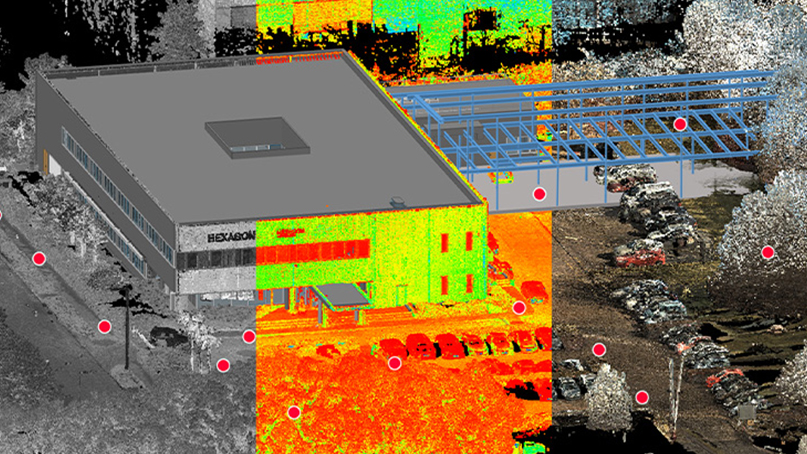
Construction verification. Overlaying a point cloud on your Revit model lets you compare what was built against what was designed. Deviations become immediately visible when the scan data does not match the model geometry.
As-built documentation. At project completion, a point cloud linked into the Revit model creates a permanent, measurable record of the building as it was actually constructed — not as it was designed.
BIM model creation (Scan-to-BIM). BIM modelers use the point cloud as a tracing reference to create intelligent Revit objects — walls, floors, columns, pipes, ducts — that match the real building. The point cloud acts as the measured foundation for the entire model.
Supported File Formats in Revit
Revit accepts point clouds in three format families:
RCP and RCS (Autodesk Native)
- RCS (ReCap Scan) — Individual scan position files
- RCP (ReCap Project) — Project files that reference multiple RCS files as a unified dataset
RCP/RCS is Autodesk’s native point cloud format, created by processing raw scan data through Autodesk ReCap Pro. These files are optimized for Revit’s rendering engine and generally provide the best viewing performance inside Revit.
When to use: Whenever you have access to ReCap Pro or your scanning provider delivers in this format. RCP/RCS offers the smoothest experience in Revit.
E57 (Open Standard)
Starting with Revit 2025, E57 files import directly without needing conversion through ReCap first. E57 is the ASTM E2807 open standard, supported by virtually every scanner manufacturer and point cloud software platform.
When to use: When you receive scan data in E57 and want to avoid the extra step of converting through ReCap Pro. Direct import works well for most projects, though very large E57 files may load slower than optimized RCP/RCS files.
Older Formats (via ReCap Conversion)
Formats like PTX, PTS, FLS, CLR, and ZFS are not directly importable into Revit. These must first be processed through ReCap Pro, which converts them to RCP/RCS. If your scanning provider delivers in these formats, you will need ReCap Pro or can request E57/RCP delivery instead.
For a detailed comparison of all point cloud file formats, see our point cloud file formats guide.
Step-by-Step: Importing a Point Cloud into Revit
Step 1: Prepare Your Point Cloud
Before importing, verify that your point cloud data is:
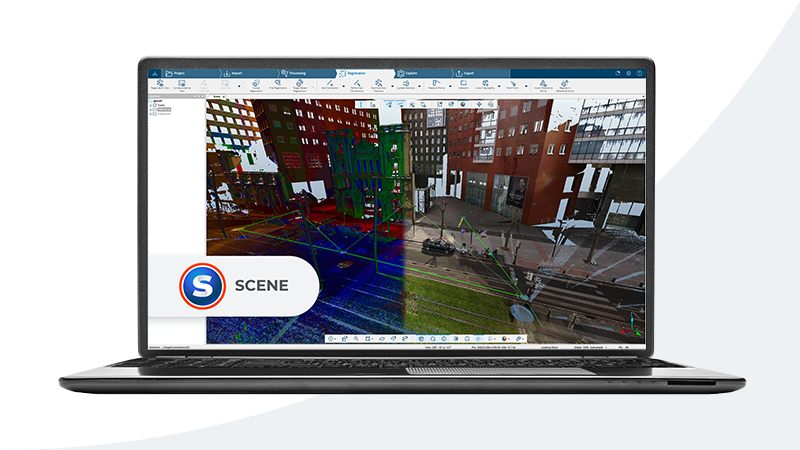
- Registered — All scan positions aligned into a single coordinate system. If you receive individual scan files that are not yet aligned, you need registration software (ReCap Pro, Leica Cyclone, or similar) to combine them first.
- Cleaned — Noise, artifacts, and unwanted objects (people, temporary scaffolding) removed. This is typically done by your scanning provider during processing.
- In a supported format — RCP/RCS or E57 for direct import.
If your data is in E57 and you want to convert to RCP for better Revit performance, open the E57 file in ReCap Pro, verify the registration, and save as an RCP project.
Step 2: Open or Create Your Revit Project
Open the Revit project where you want to link the point cloud. If starting a new project for Scan-to-BIM work, create a new project using the appropriate template. Set up your project base point and survey point to match the coordinate system of your scan data — this ensures proper positioning.
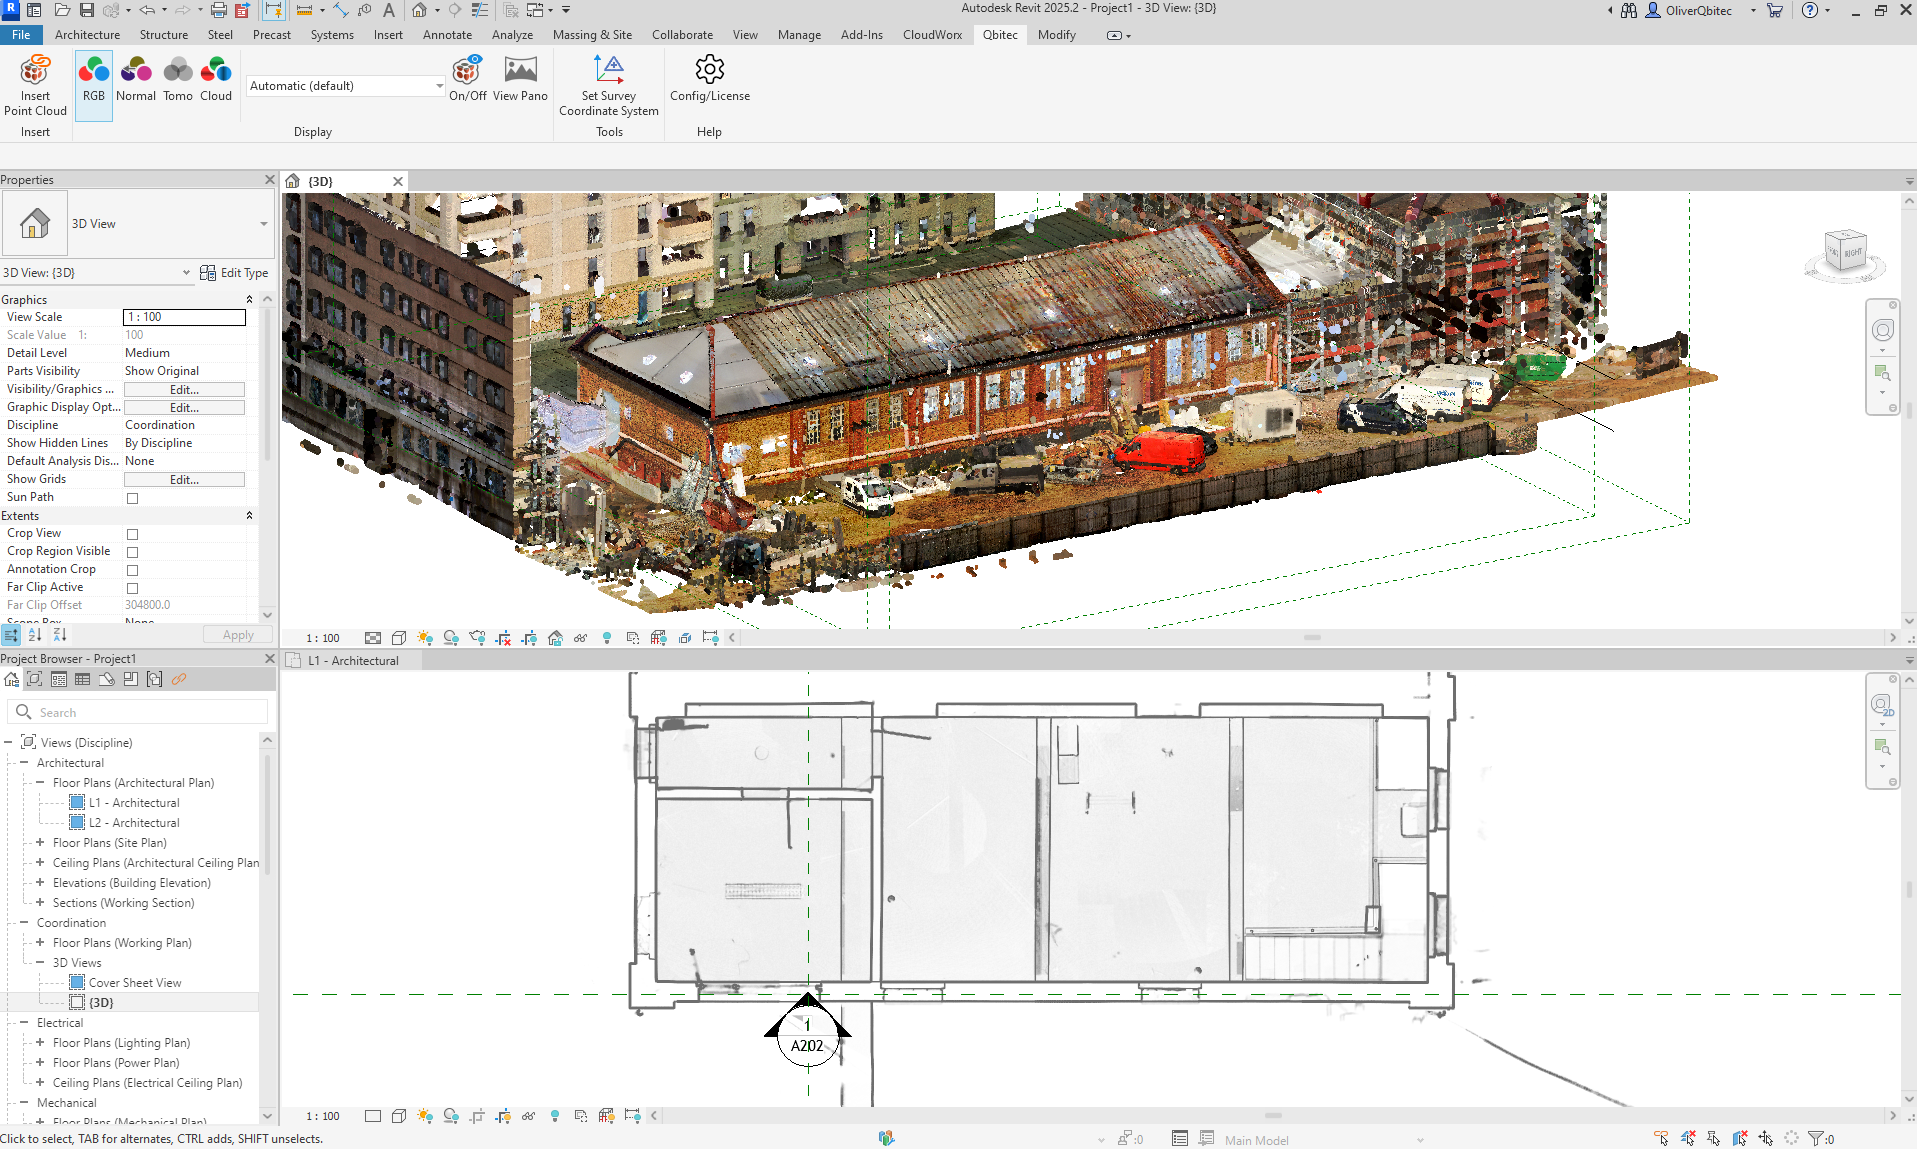
Step 3: Link the Point Cloud
- Go to the Insert tab in the Revit ribbon
- In the Link panel, click Point Cloud
- Browse to your RCP, RCS, or E57 file
- Select the file and click Open
- In the positioning dialog, choose one of these options:
- Auto - Origin to Origin — Places the point cloud’s origin at Revit’s project internal origin. Use this when your scan data is in a local coordinate system.
- Auto - Center to Center — Centers the point cloud in the current view. Useful for quick viewing but may require manual repositioning.
- Auto - By Shared Coordinates — Uses survey points and shared coordinates to position the point cloud. Best for projects where survey control was established during scanning.
For most building documentation projects, Auto - Origin to Origin is the safest starting choice. You can reposition the linked point cloud afterward if needed.
Step 4: Verify Positioning
After linking, switch to a 3D view to verify the point cloud loaded correctly:
- Check that the point cloud appears in the expected location relative to your project geometry (or origin, if starting from scratch)
- Verify the scale is correct by measuring a known dimension (a door width, column spacing, or room length)
- If the point cloud needs repositioning, select it and use Move or Rotate commands, or adjust the link’s position through Manage Links
Working with Point Clouds in Revit
Visibility and Display Settings
Control how the point cloud appears through the Visibility/Graphics dialog (shortcut: VG):
- Point Clouds category controls overall visibility
- Color Mode options include:
- True Color (RGB) — Shows the actual colors captured by the scanner’s camera
- Elevation — Color-codes points by height, useful for identifying floor levels
- Intensity — Shows laser reflection intensity, useful for distinguishing materials
- Normals — Color-codes based on surface orientation
- Point Size — Adjust from 1 to 16 pixels depending on your display needs
Clipping and Section Boxes
Large point clouds can obscure your view when modeling. Revit provides several tools to isolate the portion you need:
Section Box. Enable a 3D section box (View tab > Section Box) to crop the point cloud to a specific volume. Drag the section box faces to isolate individual rooms, floors, or building sections.
Crop Region. In plan and section views, the crop region automatically clips the point cloud to the visible area. Adjust the view range to control which portion of the point cloud appears in each floor plan.
Point Cloud Clipping. Select the linked point cloud and use the Clip toggle in the Modify tab to enable/disable clipping. You can define clipping planes to hide portions of the point cloud while keeping them loaded.
Measuring from Point Clouds
Revit allows you to snap to points in a linked point cloud for measurements:
- Use the Measure tool (tab shortcut: DI) and snap to individual points
- Create reference planes and levels by snapping to point cloud surfaces
- When modeling walls, floors, or other elements, you can snap to the point cloud to set positions and dimensions
Note that point cloud snapping works best when you are zoomed in to a manageable point density. At wide zoom levels, snapping can be imprecise.
Performance Tips for Large Point Clouds
Building-scale point clouds commonly contain 500 million to several billion points. Loading this volume of data into Revit requires attention to performance management.
Hardware Recommendations
- RAM: 32 GB minimum for typical building scans; 64 GB for large or multi-building projects
- GPU: A dedicated graphics card with 4+ GB VRAM significantly improves point cloud rendering performance
- Storage: SSD storage for your project file and point cloud data reduces load times substantially compared to spinning drives
- CPU: Multi-core processor (8+ cores) helps with Revit’s general performance, though point cloud rendering is more GPU-dependent
Software Optimization Strategies
Reduce point density in views. In Visibility/Graphics > Point Clouds, reduce the density percentage. You rarely need 100% point density for modeling — 25-50% is often sufficient and dramatically improves responsiveness.
Use section boxes aggressively. A 3D section box that isolates just the area you are modeling reduces the number of points Revit needs to render by 80-95%.
Work in plan views. Point clouds render more efficiently in plan and section views than in 3D perspective views. Do your detailed modeling work in plan/section views and switch to 3D only for verification.
Close unnecessary views. Each open view with a visible point cloud consumes rendering resources. Close views you are not actively using.
Link rather than import. Always use “Link Point Cloud” rather than “Import.” Linked point clouds reference the external file without embedding it in the Revit project, keeping your RVT file size manageable.
Consider RCP/RCS over E57. Autodesk’s native format includes spatial indexing that helps Revit load and display only the points visible in the current view. E57 files may not have this optimization, resulting in slower performance for equivalent datasets.
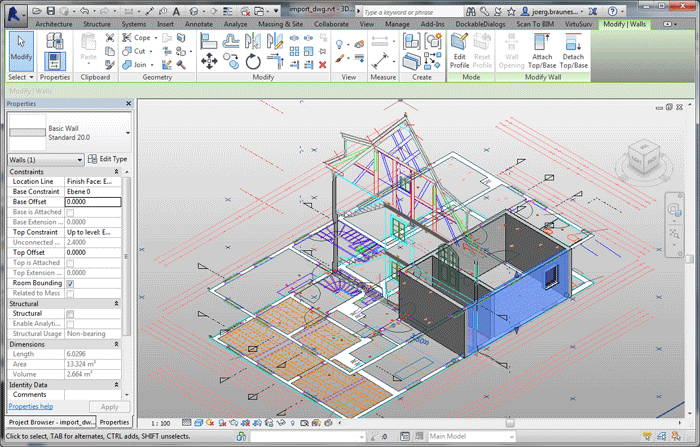
From Point Cloud to BIM Model: The Scan-to-BIM Workflow
Importing the point cloud is only the first step. The real work of Scan-to-BIM involves a skilled BIM modeler tracing over the point cloud data to create intelligent Revit objects. Here is how that workflow typically proceeds:
1. Establish Levels and Grids
Using the point cloud as reference, create Revit levels at each floor elevation and set up a structural grid. Measure floor-to-floor heights directly from the point cloud by snapping to floor and ceiling surfaces.
2. Model Primary Structure
Trace walls, columns, beams, and floor slabs over the point cloud geometry. The modeler identifies each structural element, determines its type and dimensions, and creates corresponding Revit families. This requires both BIM expertise and construction knowledge — understanding what you are looking at in the point cloud.
3. Model MEP Systems
For LOD 300+ deliverables, ductwork, piping, conduit, and equipment are modeled from the point cloud. MEP modeling from scan data is particularly challenging because these systems are three-dimensional, often partially hidden, and require knowledge of standard sizing and routing conventions.
4. Add Architectural Elements
Doors, windows, stairs, railings, and finish elements are modeled at the specified level of detail. The point cloud provides precise opening dimensions and positions.
5. Quality Assurance
The completed model is overlaid against the original point cloud. Deviation analysis identifies areas where the model does not match the measured reality, and corrections are made until the model meets the specified tolerance (typically 1-2 inches for LOD 300).
Level of Detail (LOD)
The amount of work in a Scan-to-BIM project depends heavily on the specified LOD:
- LOD 200 — Basic geometry, approximate sizes and locations
- LOD 300 — Accurate geometry, specific systems identified
- LOD 350 — Coordination-ready, includes connections and interfaces between systems
- LOD 400 — Fabrication-ready, includes manufacturer-specific detail
Higher LOD levels require exponentially more modeling time. A LOD 200 model of a 50,000 SF building might take 2-3 weeks, while LOD 350 for the same building could take 6-10 weeks.
For more detail on the Scan-to-BIM process and how it compares to traditional approaches, see our BIM scanning guide and BIM vs CAD comparison.
How THE FUTURE 3D Delivers Revit-Ready Scan Data
THE FUTURE 3D delivers BIM-conversion-ready point cloud data in RCP/RCS and E57 formats. Our scan data is registered, cleaned, and optimized for direct import into Revit — giving your modeling team or external BIM firm a precise, reliable foundation for their work.
THE FUTURE 3D provides the 3D laser scan data. Your team or a third-party BIM firm handles the Revit modeling. We do not produce BIM models or CAD drawings. We specialize in the scanning side of the workflow — capturing production-ready point cloud data with professional-grade equipment like the Leica RTC360, FARO Focus Premium, and NavVis VLX — so your BIM team can focus entirely on intelligent modeling.
This division of expertise means you get the highest quality scan data from a dedicated scanning specialist. Whether you have an in-house Revit team, work with a third-party BIM services firm, or need recommendations for modeling partners, our deliverables are structured to integrate seamlessly into the Scan-to-BIM workflow.
Our standard deliverables include:
- RCP/RCS files — Ready for direct link into Revit and AutoCAD
- E57 files — For universal compatibility and archival
- LAS files — For surveying and GIS workflows
- Quality report — Registration accuracy, scan coverage, and deliverable specifications
To learn more about what this service involves and what it costs, see our 3D scanning cost guide.
Frequently Asked Questions
Can Revit open E57 files directly without ReCap?
Yes. Revit 2025 and later versions support direct E57 import through Insert > Point Cloud. You do not need to convert through ReCap Pro first. However, ReCap Pro can still add value for multi-scan registration, noise removal, and creating spatially indexed RCP/RCS files that may perform better in Revit for very large datasets.
How large of a point cloud can Revit handle?
Revit can technically link point clouds of any size, but practical performance depends on your hardware. With 64 GB RAM and a dedicated GPU, Revit handles building-scale datasets of 1-5 billion points reasonably well — especially when you use section boxes to limit visible points. Campus-scale datasets (10+ billion points) may require splitting into multiple linked files or using lower density settings. The key is managing what is visible at any given time.
Does importing a point cloud make my Revit file huge?
No, if you use Link Point Cloud rather than Import. Linking creates a reference to the external point cloud file without embedding the data in the RVT file. Your Revit file stays a normal size (50-500 MB), while the linked point cloud files remain separate on disk. This also means the point cloud files must remain accessible at their file path for the link to work.
Can I convert a point cloud to a Revit model automatically?
Not with current technology in a production-ready way. While AI-assisted tools are improving and some can detect planes and basic geometry, the conversion from point cloud to intelligent BIM model still requires skilled human modeling. A BIM modeler needs to identify what each surface represents (wall vs. column vs. duct), assign correct properties and types, establish object relationships, and verify accuracy. Expect automated tools to become increasingly useful as assistants over the next several years, but manual modeling remains the standard for deliverable-quality BIM.
What is the difference between linking and importing a point cloud in Revit?
Linking creates a reference to an external file — the point cloud data stays in its original location and Revit reads it from there. Importing would embed the data directly into the Revit file, dramatically increasing file size. Revit only supports linking for point clouds (not true import), which is the correct approach. Linked point clouds can be reloaded, repositioned, and unloaded without affecting the rest of the Revit model.
Need production-ready point cloud data that imports cleanly into Revit? Get a quote from THE FUTURE 3D or explore our 3D laser scanning services to learn how we deliver BIM-conversion-ready scan data.
Ready to Start Your Project?
Get a free quote and consultation from our 3D scanning experts.
Get Your Free Quote