After completing over 500 Matterport scanning projects across residential, commercial, hospitality, and industrial spaces, we have learned what separates a mediocre scan from a professional one. The difference is rarely the equipment — it is the technique.
These tips apply whether you are scanning with a Pro3, Pro2, or even a smartphone. The principles of good scanning are universal.
Camera Positioning: The Foundation of Good Scans

The Golden Rule of Scan Spacing
Place scan positions 5-8 feet apart in hallways and transitions, and 8-12 feet apart in open rooms. Too far apart creates alignment gaps and jumpy navigation. Too close wastes time without improving quality.
For a standard room (12x14 feet):
- One center scan usually covers the room
- Add a second if the room has deep alcoves, closets, or L-shapes
For open floor plans:
- Follow the walking path a visitor would naturally take
- Place scans at natural transition points (doorways, room boundaries)
- Add scans near focal points (kitchen island, fireplace, feature wall)
Consistent Height Matters
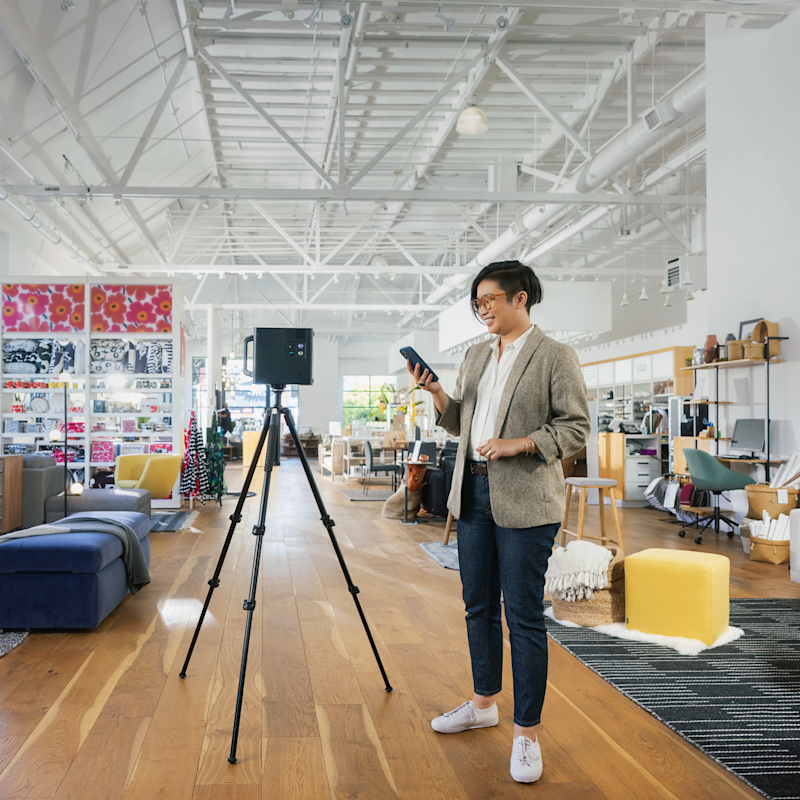
Set the tripod to approximately 5 feet (1.5 meters) for every scan in a project. Varying the camera height between scan positions creates an uncomfortable “roller coaster” effect when users navigate the tour. The only exception is scanning from an elevated position (balcony, mezzanine) where a different height is the actual viewing perspective.
Doorway Positioning
One of the most common mistakes is placing the camera directly in a doorway. This causes problems:
- The door frame creates visual artifacts at the edges of the scan
- Navigation through the doorway feels awkward
- Alignment between rooms can suffer
Instead, place one scan just inside the room near the doorway, and another scan on the other side of the wall in the adjacent space. The slight overlap creates smooth transitions.
Staircase Technique
Staircases are the most challenging transition in any Matterport scan:
- Place a scan at the bottom of the stairs
- Place a scan at the midpoint (landing) if there is one
- Place a scan at the top of the stairs
- In the stairwell, set the tripod to the lowest stable height that still captures the full staircase
- Overlap coverage between each staircase scan to ensure solid alignment
Avoid These Positions
- Against walls — creates distorted close-up views and alignment issues
- In front of mirrors or large glass surfaces — confuses the depth sensor
- In direct line of bright windows — extreme exposure differences affect alignment
- On soft surfaces (carpet, rugs) where the tripod might settle between scans — slight camera movement between scanning modes ruins alignment
Lighting: The Most Overlooked Factor
The Professional Approach
The single best thing you can do for scan quality is to set consistent lighting before you start scanning:
- Turn on ALL interior lights. Every fixture, lamp, and under-cabinet light. Consistent artificial lighting creates even exposure across the space.
- Close blinds on sun-facing windows. Direct sunlight creates extreme exposure differences that even HDR cannot fully handle. Diffused daylight through closed blinds is ideal.
- Leave blinds open on shade-side windows. This allows soft natural light without harsh sun exposure.
- Check for mixed color temperatures. If a room has warm incandescent lights and cool fluorescent fixtures, choose one or the other for consistency.
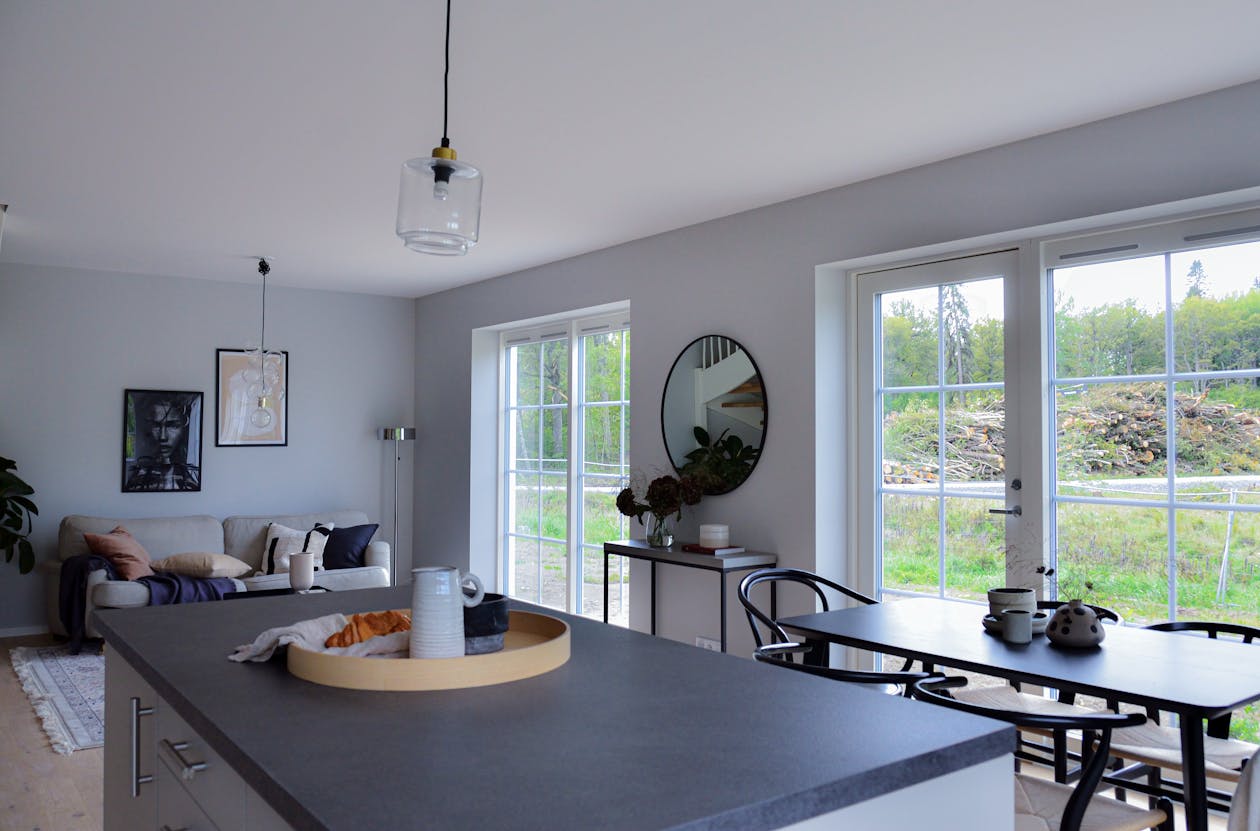
The Window Problem
Windows are the single biggest quality challenge in Matterport scanning. The dynamic range between a bright exterior and a darker interior exceeds what any camera can capture in a single exposure.
Best practices for windows:
- Close sheer curtains or blinds if available
- Scan during overcast days when possible (diffused light, no harsh sun)
- For real estate tours where window views matter, accept that some compromise is necessary
- Never scan with the camera directly facing a bright window — position scans so windows are to the side
Night Scanning
Some spaces look dramatically better when scanned at night with artificial lighting only:
- Restaurants and bars
- Hospitality lobbies
- Entertainment venues
- Showrooms with display lighting
Night scanning eliminates the window exposure problem entirely and gives you full control over the lighting ambiance. The trade-off is that exterior views through windows will be dark.
Staging and Preparation
What to Do Before the Camera Comes Out
A 15-minute preparation walk-through before scanning saves hours of frustration:
Remove or reposition:
- Trash cans (move to closets or out of frame)
- Personal items (medications, mail, personal photos if the client prefers)
- Cleaning supplies on counters
- Coats and shoes in entryways
- Pet items (food bowls, litter boxes, beds)
- Temporary items (Amazon boxes, drying laundry)
Adjust:
- Toilet lids down (this is noticed in every residential scan)
- Shower curtains open or closed consistently
- Closet doors closed (unless showcasing closet space)
- Cabinet doors fully closed
- Ceiling fans turned off (spinning blades cause artifacts)
Turn on:
- All lights and lamps
- Under-cabinet lighting
- Display and accent lighting
- Fireplace (if gas — adds ambiance)
People and Pets
Remove all people and pets from the space before scanning. The Matterport camera captures HDR imagery over a 20-second period. Any movement during this time creates ghosting artifacts — translucent people and blurred objects that cannot be removed in post-processing.
If you cannot remove people entirely (scanning a busy hotel lobby, for example), time your scans during low-traffic periods and be prepared for some artifacts.
Common Mistakes and How to Fix Them
Mistake 1: Not Enough Overlap Between Scans
Symptom: Gaps in coverage, rooms that are not connected, or navigation that “jumps” between positions.
Fix: Ensure adjacent scan positions have at least 30% visual overlap. If two scans cannot see at least some of the same features (walls, furniture, artwork), the alignment algorithm cannot connect them.
Mistake 2: Scanning Reflective Surfaces
Symptom: Distorted geometry around mirrors, polished marble, glass walls, or chrome fixtures.
Fix: You cannot entirely avoid reflective surfaces, but you can minimize their impact:
- Do not place the camera directly facing a large mirror
- In bathrooms with large mirrors, position the camera off to the side
- In spaces with floor-to-ceiling glass, scan at an angle rather than perpendicular
- Accept some artifacts — they are usually less noticeable in the final tour than during scanning
Mistake 3: Inconsistent White Balance
Symptom: Some rooms look warm (yellow/orange) while adjacent rooms look cool (blue/white), creating a jarring transition.
Fix: Use the same white balance approach for the entire project. The Matterport camera handles white balance automatically, but you can influence results by standardizing the light sources. If a room has dramatically different lighting character, consider adjusting the fixtures to match the rest of the space.
Mistake 4: Scanning Too Fast
Symptom: Blurry scans, alignment failures, incomplete captures.
Fix: Wait for the camera to complete its full rotation before moving to the next position. The Capture app shows a progress indicator — do not touch the tripod until it shows complete. On soft surfaces, be especially careful not to bump the tripod when moving between positions.
Mistake 5: Ignoring the Starting Position
Symptom: Tour opens in a random hallway or closet instead of the main entrance.
Fix: After processing, set the starting position to the most impactful view — typically the front entrance or the main living area. First impressions matter, and the starting position is the viewer’s first experience of the space.
Post-Processing Best Practices
Setting Navigation Flow
After the scan processes, review the navigation path:
- Set the starting position to the best first impression
- Check that navigation between rooms flows logically
- Verify staircase transitions work smoothly
- Test the tour from a viewer’s perspective
Adding Labels and Information
For commercial and hospitality tours, add Mattertags to highlight:
- Room names and types
- Key features and amenities
- Dimensions of important spaces
- Contact information and booking links
- Directional guidance for large properties
Highlight Reel
Create a highlight reel that showcases the best 5-10 views in the tour. This becomes a shareable video snippet for social media and marketing.
Equipment Maintenance
Before Every Scan Day
- Check camera lens for dust, fingerprints, or smudges
- Verify battery is fully charged (carry a spare)
- Confirm Capture app is updated to the latest version
- Test with a quick scan in your office to verify everything works
Monthly
- Clean the camera lens with a microfiber cloth and lens cleaning solution
- Update camera firmware if available
- Back up all project data to cloud storage
- Review and maintain your tripod (check leg locks, center column)
Key Takeaways
-
Scan positioning is the most important skill. 5-8 feet apart in hallways, 8-12 feet in rooms, consistent height, and 30% overlap between positions.
-
Lighting makes or breaks the result. All interior lights on, sun-facing blinds closed, consistent color temperature throughout.
-
15 minutes of preparation saves hours of frustration. Walk through the space before scanning to address staging issues.
-
Avoid the four enemies: mirrors, direct sunlight, moving people, and inconsistent camera height.
-
Post-processing matters. Set a strong starting position, logical navigation flow, and add relevant labels.
-
Practice before charging. Your first 10 scans should be practice, not paid client work.
-
Quality compounding. Each of these tips individually makes a small difference. Combined, they produce dramatically better results.
Want professional-quality Matterport results without the learning curve? THE FUTURE 3D brings 500+ projects of experience to every scan. Get a quote or learn more about our virtual tour services.
Ready to Start Your Project?
Get a free quote and consultation from our 3D scanning experts.
Get Your Free Quote