For most of the 20th century, creating as-built documentation meant the same thing: send a crew to the building with tape measures, laser distance meters, and clipboards. Walk every room. Stretch the tape across every dimension. Sketch floor plans by hand. Transfer the sketches to drafting paper, and later to CAD software. Hope that the crew measured everything that would be needed later.
This process worked — in the sense that it produced documentation. But it was slow, labor-intensive, and inherently limited by human measurement precision and the assumption that someone could predict in advance which measurements would matter.
3D laser scanning did not just improve this process. It replaced it.
The Old Way: Tape Measures, Laser Distance Meters, Field Sketches

Manual as-built measurement follows a process that has not changed fundamentally in decades.
The Workflow
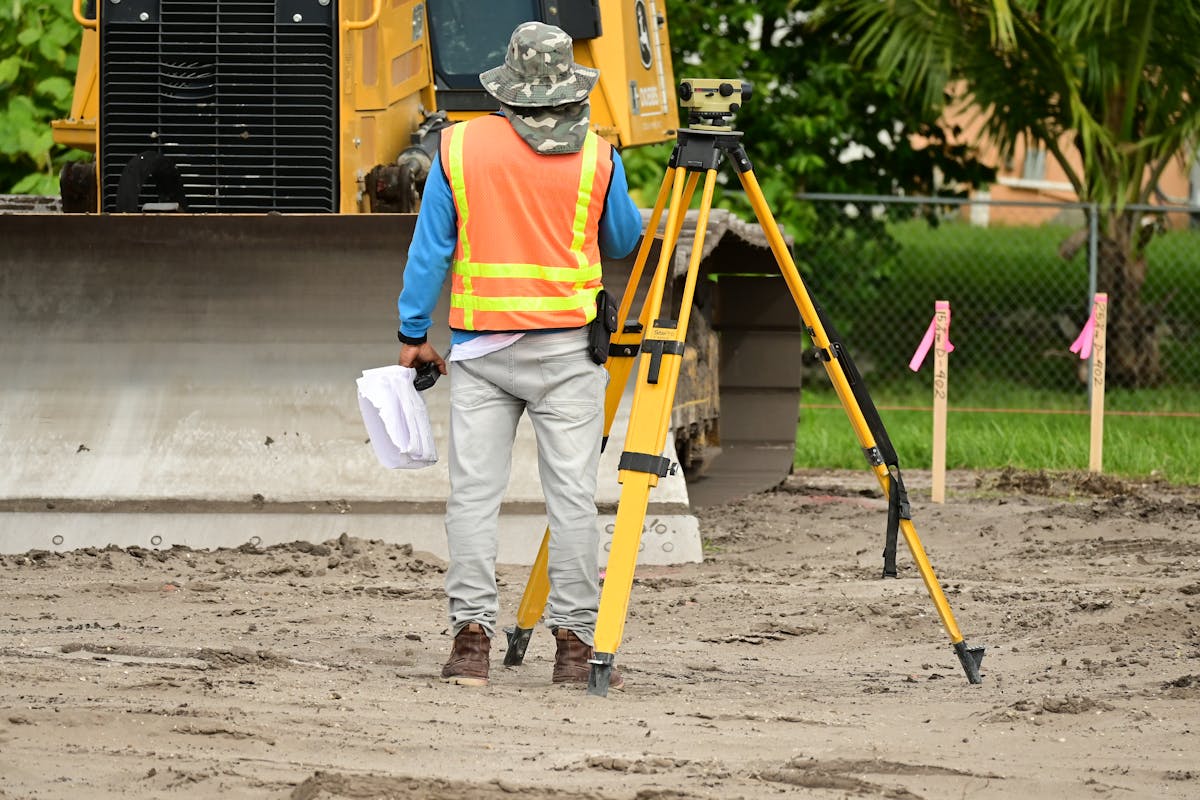
A field crew arrives at the building with tape measures (typically 100-foot steel tapes and 25-foot pocket tapes), a laser distance meter, a clipboard with graph paper, and a digital camera. The crew walks through every space, stretching tape measures between walls, shooting laser distances to ceilings and across open areas, and sketching room layouts by hand with dimensions noted.
Complex areas — mechanical rooms, ceiling plenums, elevator shafts — require additional time and often additional crew members to hold tape ends, read dimensions from awkward positions, and sketch irregular geometry.
Back at the office, a CAD technician translates the field sketches into digital floor plans, interpreting handwritten notes, resolving conflicting dimensions, and making judgments about areas where measurements seem incomplete or inconsistent.
The Limitations
This process has served the industry for decades, but its limitations are well understood.
Speed. Manual measurement of a 50,000 square foot commercial floor takes a crew of 2 to 3 people approximately 5 to 7 working days to complete. Complex areas like mechanical rooms and utility corridors add additional days. A multi-story building can take weeks of field time.
Accuracy. Individual tape measurements are typically accurate to within 1/4 to 1/2 inch at short distances. But accuracy degrades with distance, and cumulative errors grow as measurements chain together across large spaces. A room-to-room accumulation of 1/4-inch errors across 20 rooms can produce a floor plan that is several inches off at the far end of the building — a discrepancy that creates real problems when renovation designs depend on those dimensions.
Completeness. The crew measures what they think matters and what they can physically reach. Dimensions above ceilings, behind equipment, in tight mechanical spaces, and at high elevations are frequently omitted or estimated. When someone needs a measurement that was not taken — and this happens on virtually every renovation project — a return visit to the site is required.
Safety. Accessing elevated areas, confined spaces, and active mechanical rooms for manual measurement creates safety risks. Working at height on ladders, reaching into ceiling plenums, and measuring in spaces with energized equipment all carry risk that can be reduced with remote sensing technology.
Subjectivity. Two different crews measuring the same building will produce different results. The field sketches reflect each individual’s judgment about what to measure, how to orient the sketch, and how to represent complex geometry. The CAD translation adds another layer of interpretation.
The New Way: 3D Laser Scanning
A 3D laser scanner sitting on its tripod fires a laser beam across the room — rotating 360 degrees horizontally and vertically — measuring the distance to every surface the beam contacts. Modern scanners like the Trimble X12, FARO Focus Premium, and Leica RTC360 capture 2.2 million measurement points per second, with each point recording its precise XYZ coordinate, reflectance intensity, and color information from an integrated camera.
In 2 to 5 minutes, a single scan position captures every visible surface within its range — walls, floors, ceilings, structural elements, MEP systems, furniture, equipment, signage, and architectural details. The result is a “point cloud” — a dense three-dimensional representation of the space made up of millions of individual measured points.
Multiple scan positions are registered (aligned) into a single unified coordinate system, creating a seamless 3D record of the entire building. The registered point cloud can be navigated, measured, sectioned, and exported in any direction — providing unlimited access to dimensional data captured during a single site visit.
How It Works in Practice
Our scanning crew arrives at the building with a terrestrial laser scanner (typically the Trimble X12 for its survey-grade accuracy) and sets up the first scan position. The scanner completes its rotation in 2 to 5 minutes. The crew moves the scanner to the next position — typically 20 to 30 feet away — and repeats. In a typical 20,000 square foot floor plate, 40 to 80 scan positions cover the entire space.
A full floor can be scanned in one working day. The crew does not need to stretch tape measures, sketch floor plans, or make judgments about which dimensions to capture. The scanner captures everything.
Back in the office, the individual scans are registered into a unified point cloud and cleaned of noise and transient objects. The registered point cloud is then delivered as BIM-conversion-ready scan data — the precise 3D reference your design team (or a third-party CAD/BIM firm) uses to produce whatever the project requires, whether 2D floor plans, reflected ceiling plans, building sections, or a Revit model built in their software of choice.
Speed Comparison: The Numbers Tell the Story
For a 10,000 square foot commercial building — a typical small office building or single floor of a larger structure — the speed difference is dramatic.
Manual Measurement
- Field time: 3 to 5 days (crew of 2)
- Office time: 3 to 5 days for CAD production
- Total time: 6 to 10 business days
- Return visits: 1 to 2 (average) for missed measurements
- Total including return visits: 8 to 14 business days
3D Laser Scanning
- Field time: 4 to 8 hours (1 technician)
- Office time: 2 to 3 days for registration and deliverable production
- Total time: 3 to 4 business days
- Return visits: 0 (the point cloud contains all measurable data)
- Total: 3 to 4 business days
For larger buildings, the scaling advantage of scanning becomes even more pronounced. A 100,000 square foot building that takes a manual crew 4 to 6 weeks of field time can be scanned in 3 to 5 days.
Accuracy Comparison: Millimeters vs. Fractions of an Inch
The accuracy difference between manual measurement and 3D scanning is not marginal — it is an order of magnitude.
Manual Measurement Accuracy
- Individual measurements: ±1/4 inch to ±1/2 inch (6 to 12 mm)
- Cumulative accuracy across a floor: ±1 to 3 inches (25 to 75 mm) due to error propagation
- Vertical measurements (ceiling heights): ±1/2 inch to ±1 inch (12 to 25 mm)
- Complex geometry (curves, angles, irregular shapes): ±1 to 2 inches (25 to 50 mm)
3D Laser Scanning Accuracy
- Individual measurements: ±1 to 4 mm (0.04 to 0.16 inches)
- Cumulative accuracy across a floor: ±2 to 6 mm (no significant error propagation)
- Vertical measurements: Same as horizontal — ±1 to 4 mm
- Complex geometry: Same accuracy regardless of shape complexity
The critical advantage is the absence of cumulative error. Each point in a laser scan is independently measured from the scanner’s position. Errors do not chain together across the building. A measurement taken at one end of a 200-foot floor is exactly as accurate as a measurement taken at the other end.
The “One Measurement” Advantage

This is perhaps the most transformative difference between manual measurement and 3D scanning, and it is the advantage that clients understand most immediately.
With manual measurement, every dimension you might ever need must be anticipated and captured during the field visit. If you need the distance between two columns, someone must have measured it. If you need the offset between a duct and a beam, someone must have measured it. If no one thought to take that measurement — or if it was physically inaccessible at the time — a return visit is required.
With 3D scanning, you take one measurement — the scan — and extract unlimited dimensions from the data afterward. Need the distance between two columns? Measure it in the point cloud. Need the offset between a duct and a beam? Measure it in the point cloud. Need a dimension that nobody anticipated needing? If it was visible to the scanner, it is in the point cloud, extractable at any time, from any angle.
This capability eliminates return visits. It eliminates the “we did not measure that” conversation. It means the building owner has a complete measurement record that serves every future purpose — renovation design, space planning, insurance documentation, compliance verification — from a single scanning effort.
For renovation projects specifically, this advantage is transformational. See our guide on as-built documentation for renovation to understand how scan data supports the design process.
When Manual Measurement Still Has a Role

3D laser scanning has replaced manual measurement for most as-built documentation applications, but there are specific situations where traditional methods still contribute.
Behind Walls and Inside Cavities
Laser scanners capture visible surfaces. They cannot see through drywall, behind panels, or inside enclosed cavities. For documenting concealed elements — in-wall plumbing, electrical wiring inside conduit, insulation characteristics — manual investigation or specialized techniques like ground-penetrating radar are still needed.
Nameplate and Label Data
Equipment model numbers, electrical panel schedules, valve tag numbers, and other text-based information are too small for laser scanners to reliably capture. A technician with a camera and clipboard is still the most efficient way to collect nameplate data, manufacturer information, and equipment specifications.
Tight Access Areas
While scanners have become increasingly compact, there are still spaces too small or too restricted for a tripod-mounted scanner — inside ductwork, inside elevator cars, inside electrical cabinets. These areas are documented through a combination of photography and manual measurement.
Survey Control and Legal Boundaries
For projects requiring licensed surveyor certification — property boundary surveys, topographic surveys, and survey-grade control networks — traditional survey instruments (total stations and GPS receivers) remain the standard of practice. 3D laser scanning complements survey work but does not replace the legal framework around licensed surveying.
For projects in Florida requiring PSM-certified survey documentation, Apex Surveying & Mapping provides licensed surveyor services across all 67 counties.
Equipment Evolution: Where the Technology Stands Today
The scanning equipment available today bears little resemblance to the first-generation scanners of 20 years ago.
Trimble X12
Our primary scanner for building documentation work. The X12 delivers survey-grade accuracy (±1mm @ 10m / ±2mm @ 20m), captures 2.2 million points per second, and includes parallax-free imaging with LED spotlights for dark environments. It weighs 5.9 kg (approximately 13 pounds) and runs on a single battery for a full day of scanning.
FARO Focus Premium
A widely used scanner for building documentation, offering ±2mm accuracy at 10m and range up to 200 meters (400 meters for the Premium Max model). The Focus Premium captures up to 2 million points per second and features Flash Technology that reduces scanning time by up to 50 percent. It is known for its reliability in demanding environments.
NavVis VLX3
A wearable mobile mapping system designed for rapid documentation of large facilities. While not as precise as tripod-mounted scanners (accuracy of ±5mm, or ±3mm with ground control points, versus ±1 to 4mm for tripod scanners), the VLX3 can document a 50,000 square foot floor in under an hour — versus a full day for tripod-based scanning. This makes it ideal for large warehouse, retail, and campus environments where speed outweighs the need for maximum precision.
Cost Comparison: Scanning vs. Manual
The cost comparison between scanning and manual measurement has shifted dramatically over the past decade. As scanning equipment has become more affordable and field crews have become more efficient, the cost premium for scanning has largely disappeared for commercial projects.
For a typical 10,000 square foot commercial building:
- Manual as-built documentation: $5,000 to $12,000 (including field time, CAD production, and return visits)
- 3D scanning as-built documentation: $3,000 to $8,000 (including field scanning, registration, and point cloud delivery)
For larger buildings, the cost advantage of scanning increases because scanning scales more efficiently than manual measurement. A 100,000 square foot building that costs $40,000 to $80,000 for manual documentation can be scanned for $15,000 to $35,000.
The cost comparison becomes even more favorable when accounting for the value of the additional data scanning provides — the complete spatial record, the elimination of return visits, and the ability to extract unlimited measurements from a single dataset.
For detailed pricing benchmarks by building type and size, see our as-built documentation cost guide. You can also compare scanning methods in our detailed scanning vs. manual as-built comparison.
Frequently Asked Questions
Q: Can 3D scanning fully replace manual measurement for as-built documentation?
For capturing the spatial geometry of a building — room dimensions, wall locations, ceiling heights, MEP routing, equipment positions — 3D scanning has fully replaced manual measurement in terms of capability. It is faster, more accurate, and more complete. Manual measurement still has a role for capturing non-geometric information (nameplate data, material identification) and for documenting areas that are not accessible to scanners (inside enclosed cavities, behind permanent walls).
Q: How long does a 3D scanner take per scan position?
Modern terrestrial laser scanners complete a full 360-degree scan in 2 to 5 minutes, depending on resolution settings. Higher-resolution scans take longer but capture more detail. For most building documentation applications, a medium-resolution scan that completes in about 3 minutes provides excellent results.
Q: What is a point cloud, and can I use it directly?
A point cloud is a dataset of millions of XYZ coordinate points that together represent the 3D geometry of the scanned environment. Point clouds can be viewed and measured in specialized software (such as Autodesk ReCap, Trimble RealWorks, or CloudCompare). Many design professionals can work directly with point clouds in their existing software — AutoCAD, Revit, and most modern CAD/BIM platforms support point cloud import.
Q: Is 3D scanning cost-effective for small projects?
Yes. For residential projects and small commercial spaces (under 5,000 square feet), scanning typically costs $1,000 to $4,000 — comparable to or less than thorough manual measurement. The data quality and completeness far exceed what manual measurement can provide, making scanning the better value proposition regardless of project size.
Q: How does the point cloud get converted into usable drawings?
The point cloud we deliver serves as a precise 3D reference over which 2D drawings or 3D BIM models can be traced. Your design team or a third-party CAD/BIM firm opens the point cloud in their software and traces floor plans, sections, and elevations directly from the scan data — similar to tracing over a photograph, but with the ability to measure any dimension precisely. The resulting drawings are accurate to the millimeter because they are drawn from measured data rather than field sketches.
Q: What file formats does scan data come in?
We deliver point cloud data in industry-standard formats: E57 (universal format compatible with virtually all 3D software), RCP/RCS (Autodesk ecosystem including Revit and AutoCAD), and LAS/LAZ (surveying and geospatial applications). These formats ensure compatibility with your existing design and facility management software.
Ready to modernize your as-built documentation with 3D laser scanning? Get a quote from THE FUTURE 3D or learn more about our 3D laser scanning services and as-built documentation capabilities.
Ready to Start Your Project?
Get a free quote and consultation from our 3D scanning experts.
Get Your Free Quote